KATB Blog

peach jam & mini scone ice cream sliders

Though it’s tempting to jump right into the excitement of autumn, with its cozy sweaters, chilly breezes, and warm spices, here at KATB were savouring these last few dog days of summer, as I am sure we will find ourselves knee-deep in snow in a blink of an eye!  

Continue reading

mini tea sammies, 3 ways!


There are a few things that transform just any old party into a tea party.  Tea cups are an absolute must (bonus points for vintage, mismatched and pastel!), tiered trays and lots of fresh florals certainly set the mood, and scones and jam must be present for tradition’s sake.  But, a tea party isn’t really a tea party without those tiny, little white bread sandwiches we all know and love!  The most classic choices are cucumber and butter, smoked salmon, chicken, and egg salad, but for us, the more beautiful, tiny, colourful, and intricate the better!  So, as a little supplement to our Pastel Garden Brunch we styled with Alyssa of Random Acts of Pastel (full photo set coming next week!), we wanted to share our spin on the classic tea sandwich, done KATB-style 3 different ways to add a little flair to your tea party table!

Tea Sandwiches 3 Ways

Ingredients:

Loaf of classic white Wonder Bread
1 fresh cucumber
1 pint of fresh strawberries
1-3 jars of KATB jam, preferably in a variety of colours
Lavender oil (we used this one from A L’Olivier)
Butter, at room temperature
Cream Cheese, at room temperature
Culinary-grade lavender blossoms
Fresh sprigs of mint
2.25” round cookie cutter

The tiniest heart-shaped cookie cutter you can find (we found ours at Bulk Barn!)

Cucumber & Lavender

  1. Using a sharp knife or mandolin, slice your cucumber as thin as possible crosswise.
  2. Spread a thin coat of butter on your slices of white bread, and delicately place your cucumber slices in one layer to create a mosaic effect, overlapping the crusts.
  3. Then, using a sharp knife, cut through the cucumber and bread into your desired shape.  We chose squares for our cucumber sammies, and got 1 sammie out of each piece of bread.  Tip: if you find that your cucumber slices are slipping as you try to cut through them, place the whole palm of your (clean) hand on top of your sammie to hold everything in place as you cut.  Don’t be nervous to press down a little bit - the Wonder Bread will bounce right back!
  4. Set aside…

Strawberry & Mint

  1. Spread a thin layer of butter on a couple slices of Wonder Bread, then cut off the crusts and into 3 long rectangles.
  2. Using a sharp knife, hull the greenery from the top of your berries.  Sit them on their “heads,” slice them thin, and, keeping them in their original order, use your fingers to carefully fan the slices and place them on each rectangle of bread.
  3. Set aside…

Stained Glass Jam Sammies

  1. For these little gems, you will get one sammie per every two pieces of bread.  So, for three sammies, arrange 6 slices of bread on your cutting board in a 2x3 grid.
  2. Using the circle cutter, cut rounds out of all of the pieces of bread - 3 for the bases of your sammies, 3 for the tops.  Then, cut hearts out of only 3 (half) of the rounds.
  3. Spread your cream cheese on each of the bases, then add a dollop of jam and give it a slight spread with the back of your spoon.  Be careful not to spread the jam too close to the edges, or you will have a messy tea sandwich.  Also, using a variety of different types of preserves will add visual beauty and colour to your display!
  4. Place the heart-cut-out tops on top of each base, and press gently to “seal” the sammie and push the cheese and jam to the outer edges.

And now, for the grand finale!

When you are ready to serve your tea sandwiches…

  1. Drizzle a small amount of lavender oil over your cucumber mosaics, and a little sprinkle of lavender blossoms,
  2. Pluck the tiniest leaves and any flowers from the tips of your mint sprigs, and place prettily on your strawberries…
  3. Load all of your tea sammies onto your tiered tray, serve, and enjoy! Pinkies up!

Continue reading

marmalade glazed bbq chicken & sweet gin tea

Last weekend, Kitten and the Bear had the pleasure of being the guest chef at our friends Food & Liquor’s weekly summer BBQ series!  It was such a blast, and allowed us to do something new and different from our normal routine.  A big thank you to everyone who came out and joined us for the end of summer fun!  

While preparing our little jam & tea themed BBQ menu, we realized that this would be a great chance to share some different ways to use jam to spice up your standard BBQ offerings.  Of course, in typical KATB style, we also couldn’t resist the opportunity to style a rustic backyard BBQ, perfect for this beautiful time of year when summer begins to give way to the first hints of autumn.  Pops of bright yellows and rich golds, fresh fruit and greenery transform a simple picnic table to a BBQ fit for a jam and tea queen!

Sweet Orange Marmalade Glazed Chicken

Ingredients:

6 humanely-raised chicken legs, skin-on
3 tbsp KATB Sweet Orange & Honeyed Whisky marmalade
1 tbsp dry white wine
1 tbsp olive oil
2 cloves of garlic, chopped fine
Sprigs of fresh rosemary and thyme, about 1 tsp chopped finely
Sea salt

Method:

  1. Sprinkle your chicken legs generously with salt, set aside.
  2. To make your marmalade glaze, combine marmalade, white wine, olive oil, fresh herbs, garlic and an additional sprinkle of salt (about ½ tsp) in a small jar or bowl.  Shake (or whisk) vigorously to thoroughly combine.
  3. Oil the grill with a heat-proof grill brush to ensure your chicken legs won’t stick. Then heat up your BBQ to about medium-high heat.
  4. Begin to sear off your chicken, starting with skin-side down - this will be your “presentation” side, so allow the chicken to cook until the chicken lifts easily off the grill and you have nice, neat grill lines, about 5-8 minutes with the grill top closed.  Then, open, flip the legs, and sear on the bottom side for about 5 minutes, closed.
  5. Lower the heat to medium-low, and transfer all of the chicken legs to the top rack of your grill so they are off the direct heat.  Paint on your glaze, making sure to get some slices of orange, herbs and garlic chunks on there.  Close the grill, and cook for about 15 minutes, basting with more and more glaze about every 5 minutes.
  6. Your chicken will start to look more and more golden brown and delicious as the sugar in the jam and wine caramelize.  We recommend checking your chicken with a meat thermometer to ensure its doneness -  chicken is fully cooked at 165 F degrees.  At this point, remove from the grill, and allow to rest about 3-5 minutes.
  7. We served our marmalade glazed chicken alongside classic potato salad, fennel slaw, and a KATB mini scone, but any and all of your favourite BBQ sides will pair perfectly! Enjoy!
KATB Sweet Gin Tea

recipe created by Nigel French of Food & Liquor, yields about 4-6 drinks

Ingredients:

4 tbsp strong black tea (such as Bold Breakfast from Sloane Fine Tea) steeped in 1 L of water
1/4 L gin (we used Beefeater)
1 1/2 oz Cointreau
small splash of Galliano

soda water
lots of ice
beverage dispenser or punch bowl

Method:

  1. Brew your tea leaves in 1 L of boiling water for about 10 minutes, or until you have a strong, aromatic infusion.  Allow to cool to room temperature.
  2. Combine all of the ingredients in a beverage dispenser or punch bowl, adding the Galliano last in small splashes to-taste.
  3. Pour over ice and top with soda water for a bit of bubbles, and enjoy!

Continue reading

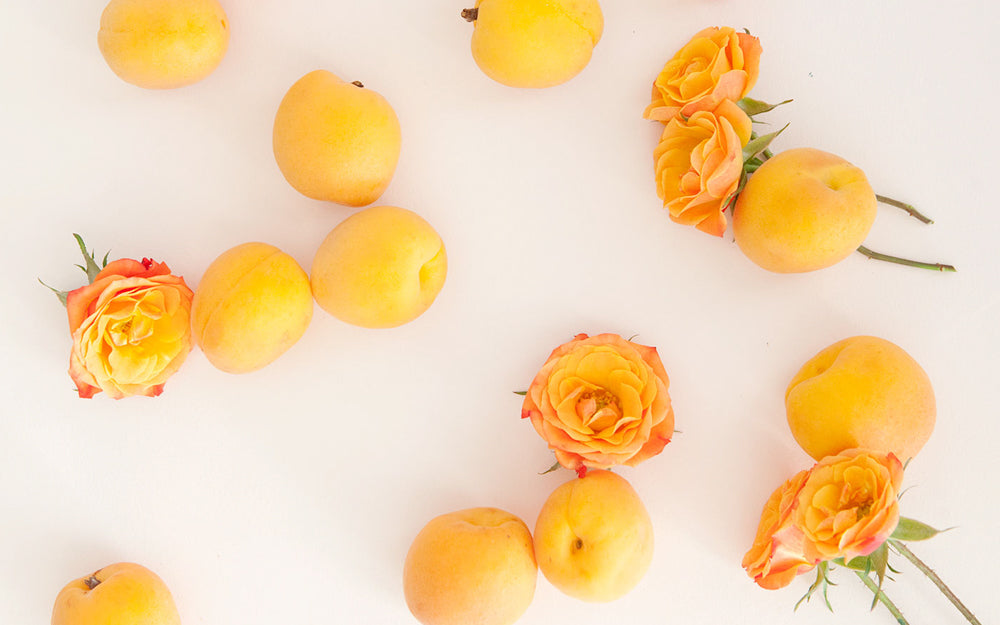
apricot rose jam with #pastelcraftclub

When my dear friends Alyssa (from Random Acts of Pastel) and Paige (from Studio Bicyclette) approached me to be a part of their #PastelCraftClub for a special one-on-one jam making session to share on their blogs, I jumped at the chance.  Spend some quality time with two of my favourite ladies, make some beautiful imagery, cook up delicious things, AND spread some tips and tricks for jam making at home? Sign me up!

Every fruit preserve is equal in my eyes, but after a bit of deliberation I decided to share not only one of the most seasonal fruits at the market right now, but also my personal favourite jam to make of the whole year!  Apricot jam is easy to prep (little to no chopping involved), intuitive to cook, bright and beautiful to look at, pairs perfectly with a variety of different flavour embellishments, and is a delicious addition to any pantry.

There are many different varieties of apricots that debut throughout the growing season, each of which have unique colours, textures, and flavour profiles.  From tiny yellow Pattersons (which we used for this shoot) to large blushed Rivals, to the most famous and rare jam-making variety Blenheims.  In California specifically, some growers are even experimenting with cross-pollination to produce unique stone fruit hybrids for added diversity and a breath of fresh air in our produce market, which has been dramatically simplified over the past couple decades for economic purposes.  Apriums, pluots, plumcots are all apricot/plum hybrid cultivars which inherit characteristics quintessential of their heritage.  In early summer, the most popular of these are the “velvet” varieties - including blackgold, and red velvet apricots. Actually apriums of 75% apricot and 25% plum, their velvety apricot-like flesh is paired with a tart, sour skin, a nod to their plum lineage.

Ontario apricots, set to debut in late July, have their own special characteristics due to our harsh northern climate.  Of course, Ontario fruit is harvested later in the summer months, featuring a more full-bodied apricot flavour with hints of tangerine.  Their denser flesh that is more resistant to breaking down when heated can be attributed to generations of growth in a northern climate as well as their freshness and short transport compared to the lengthy, refrigerated drive from California.  The end result yielding a more fruit forward, chunky preserve.

Alyssa, Paige and I had such a blast together in the kitchen, and it was an absolute joy to be able to share a little bit of the art of jam making with them, and now with you! So without further ado, scroll down for my Classic Apricot Jam recipe embellished with rose petals! I've also shared some easy peasy canning instructions to take all the stress out of preserving.  

Oh, and be sure to head over to Random Acts of Pastel and Studio Bicyclette for more recipes from local makers in the #PastelCraftClub, bright OOTDs, and other darling lifestyle goodness!

Ingredients:

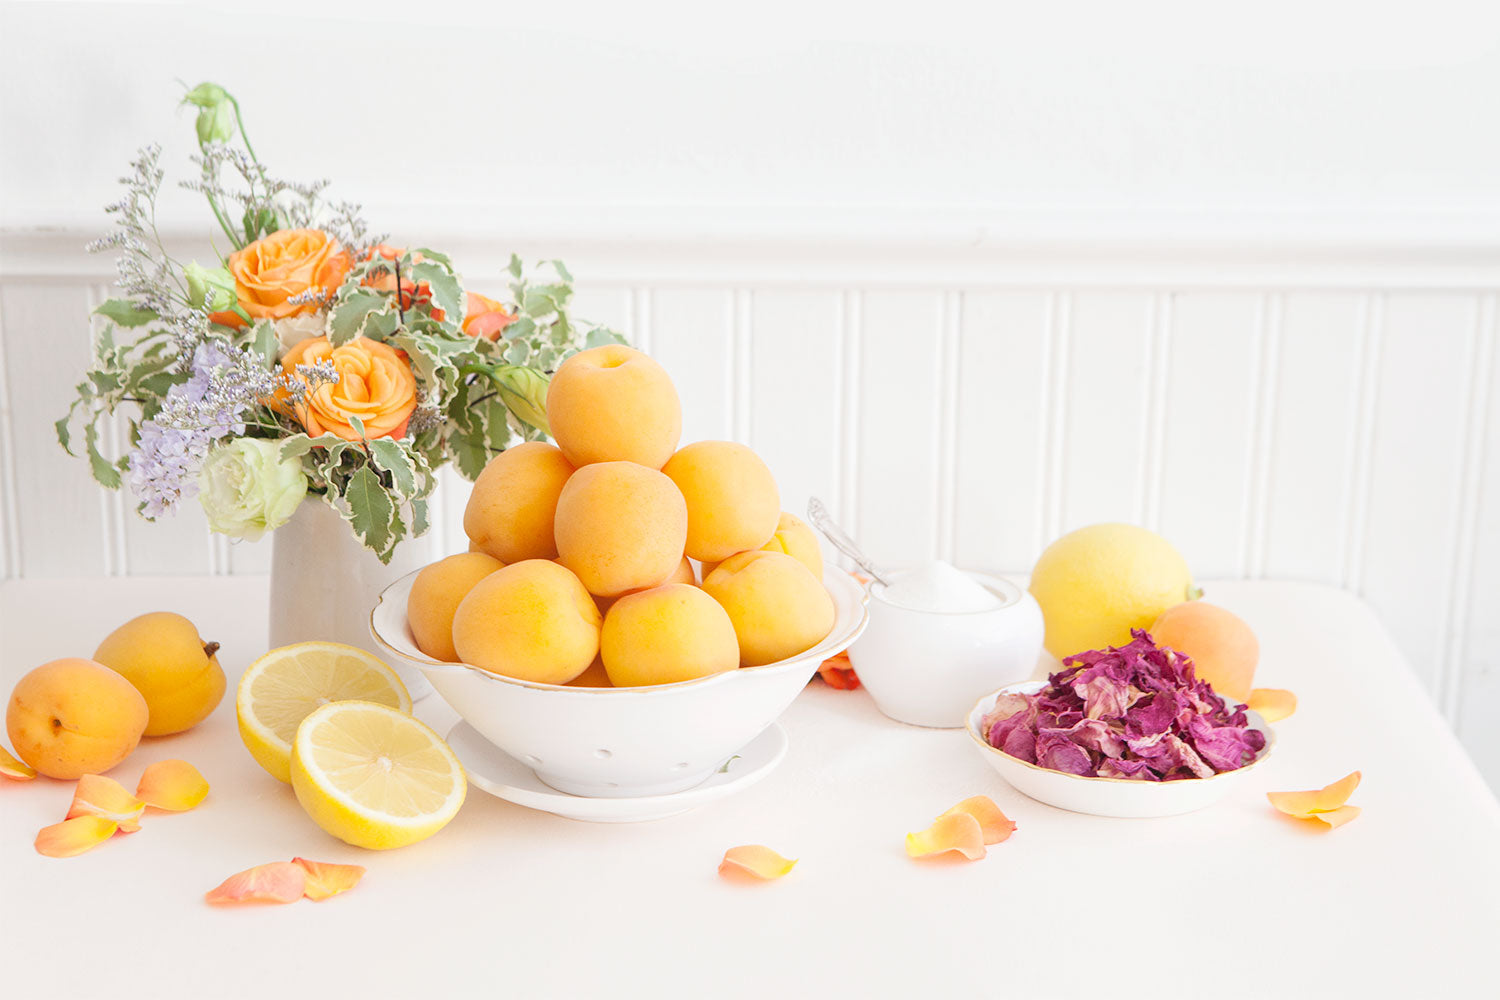
5 lb apricots of any variety, pit removed (we used small yellow Pattersons, about 45-50 apricots)
2 lb sugar
4 oz freshly squeezed lemon juice (about 2 lemons worth)
A small handful of food-grade dried rose petals

Equipment (suggested):
Traditional Mauviel copper confiture pan (available by special order through Kitten and the Bear) or wide double-bottomed stainless steel pot
Home canning kit

Method:

Day 1

  • Wash, then slice your apricots in half and remove the stone from the center.  We left our apricots in halves, but if you have larger, firmer fruit, you can cut once again in half to make 4 cubes.
  • Add the apricots, sugar, and freshly squeezed lemon juice to a non-reactive mixing bowl, toss thoroughly, and cover.
  • Allow to sit in the refrigerator overnight.

Day 2*

  • Line a clean baking sheet with clean, dry jam jars, and put into a 250 F oven.
  • Transfer your apricot mixture into a traditional copper jam pan, or wide stainless steel pot (do not use aluminum, as it will give your jam a dull colour, metallic flavour, and make it difficult for your jam to set).
  • Heat on high heat, scraping the bottom of the pan every couple minutes to avoid hot spots.
  • Your jam will come up to a boil and begin to foam.  Continue to cook, manipulating the burner heat to be at the highest heat possible without your jam boiling over.  The goal with all French style jam making is to have the highest possible heat, the most amount of evaporation, and the shortest time on the stovetop.  This results in a brightly coloured preserve with a fresh, fruit forward flavour.  Thus, this stage of cooking should only take approximately 20 minutes, depending on your pot choice and stovetop.
  • The foam will begin to fall, and you will notice that the fruit has started to get soft, puffy, and has begun to break down.
  • Continue to cook, scraping the bottom of your pot every couple minutes to avoid scorching, however not so often that you don’t allow to jam to come up to temperature and cook on its own.  
  • You will notice that the jam looks more homogenous, and the bubbles are now smaller, and more evenly distributed over the surface of the jam.  As your jam gets closer to being done, you may have to reduce your heat slightly or stir slightly more often.
  • To test for doneness, turn off the heat and scoop a representative sample of jam with a metal teaspoon.  Place the spoon in the freezer for approximately 3 minutes, keeping the pot of jam off the heat in the meanwhile. After 3 minutes, gently nudge the preserve with your finger to check the texture, and tip your spoon and see if it runs.  You can also push the pot of jam, which has now cooled ever so slightly, with a spoon or spatula to see if a skin has formed.  When you lift your spatula out of the jam, it should “sheet” rather than “drip”.
  • If you feel as though your jam should still be thicker, cook for another 5 minutes and test the jam again.  If it is done, skim off any remaining foam and stir in your dried rose petals, adding a little bit at a time to be appetizing and aesthetically appealing.
  • Remove your jars from the oven, and replace with your caps (set a timer for 10 minutes).  Using two heat-safe pitchers, scoop a pitcher full of jam out of your pot with one, and pour directly into the other.  Then, use this pitcher to portion out your jam into your sanitary jars.  I highly recommend purchasing a standard home canning kit such as this one, as a canning funnel and ruler makes this a lot easier.
  • Fill each jam to ¼” of headroom, or the first notch of your headroom gauge.  Wet a clean sheet of paper towel with hot water, and ensure there isn’t a single speck on jam on the rim or in the threading of your jars.  
  • Your caps can stay in the oven during this entire process, however ensure that they have been in the oven for *at least* 10 minutes.  Cap all of your jars according to the directions for your specific style of jar (mason or lug), and return to the oven for exactly 10 minutes.
  • Remove your jars from the oven carefully, space an inch or two apart, and allow to sit undisturbed for 24 hours to ensure a perfect set.
  • Enjoy!  This jam will keep up to 1 year sealed in your pantry (out of direct sunlight), or 3-6 months open in your fridge.

Get creative!  Apricot jams pair perfectly with a number of fun flavour embellishments. Some of my favourites are vanilla bean, amaretto, lavender, rose, kirsh, citrus zest (orange, lemon, tangerine), warm spices (cinnamon, allspice, cardamom, anise, nutmeg), brandy, ginger, and saffron.  Any spirits, petals, floral waters, zests, extracts and herbs should be added at the very end of cooking, while dried spices (ground or whole) should be added at the beginning to allow for a thorough infusion.

Continue reading

make any jam into a jam-sicle

It seems summer is here early this year in Toronto, and nothing says summer like ice pops!  Equally thirst-quenching, sweet-tooth-satisfying, and bursting with nostalgia, there’s nothing quite like reaching for a ice cold, fruity, homemade treat on a hot summer day.  One of the things we love most about ice pops is the ability to flex your creative muscles, dreaming up all sorts of fruit filled concoctions with little to no chance of the end result being anything but delicious!  

Because we don’t use any commercial stabilizers, gel-ifying agents, or added pectin in our preserves, they can be used for all sorts of kitchen magic - from dissolving beautifully into iced tea as a natural sweetener and being shaken into craft cocktails, to baking into pastries and (to our amazement I might add) as a perfect base for ice pops!

So far this summer, we’ve recipe tested all sorts of different jam flavours, and they all work beautifully.  So grab your ice pop mold (we used these and these), and get freezing!

Ingredients:

1 part your favourite KATB preserve
2 ½ parts tepid water
Freshly squeezed lemon juice, to taste

Method:

Simply add 1 part KATB preserve with 2 ½ parts water and stir to dissolve completely.  Add freshly squeezed lemon juice to your personal taste. The acidity of the lemon will brighten the fruit flavours and balance out the sweetness of the jam.  Pour into your ice pop molds, evenly distributing any chunks of fruit.  Freeze for about 24 hours to ensure your ice pops are deep frozen to the core.  

P.S. don’t be afraid to get creative!  Fill your molds part-way, freeze, and mix up a second flavour to create layered pops, or stick edible flowers down the sides before freezing for a pressed flower effect. The ice pop is your oyster!

Continue reading

baby bacon, egg & cheese breakfast sammies

baby bacon, egg & cheese breakfast sammies

When we first opened up our shop in Parkdale, our mission was to create a jam palace, filled with every fruit preserve you could imagine- a lineup of rotating seasonal creations with truly unique flavour combinations. But what paired well with fruit preserves?  Well scones and tea of course!  And so with a lot of love and care, our signature buttermilk scone was born. Little did we know that our simple, traditional recipe was about to take on a life of its own, quickly becoming  just as much a part of Kitten and the Bear as our jam!  

There’s absolutely nothing that compares to pulling a warm tray of scones out of the oven. The smell of melted butter and caramelized sugar swirls around you, and even though your fingers are burning trying to touch the hot pastry, you simply can’t wait to break them open and enjoy the rich steam escaping from that flaky inside.  

We wanted to bring this special bakery experience into the comfort of your home, so we recently launched our Frozen Mini Scones for you to take and bake. Roll out of bed, pop a couple scones in the oven (dressed in pjs of course), and fill your home with the smell of freshly baked pastries like we do here at the shop bright and early each morning.  

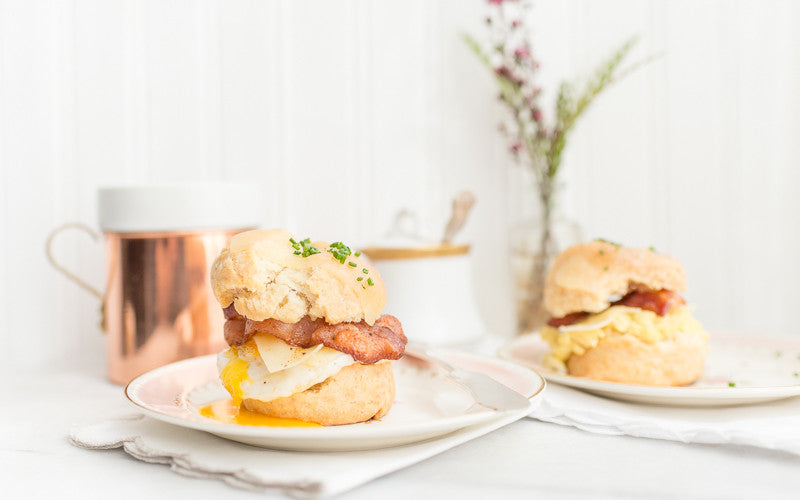
Always on the hunt for more excuses to eat a batch of scones, we have come up with a bunch of mini scone hacks that we are so excited to share with you! We weren’t sure where to start, but after some deliberation we went with a  classic- the Baby Bacon, Egg & Cheese Breakfast Sammie!

-Serves 2-
Ingredients:

1 pack KATB Frozen Bake-at-Home Mini Scones
4 farm fresh eggs
4 strips artisan cured bacon
Fresh chives
Your favourite cheese (we love aged cheddar)
Condiments & seasonings of choice (we’re into a sprinkle of Old Bay & jam)

Method:

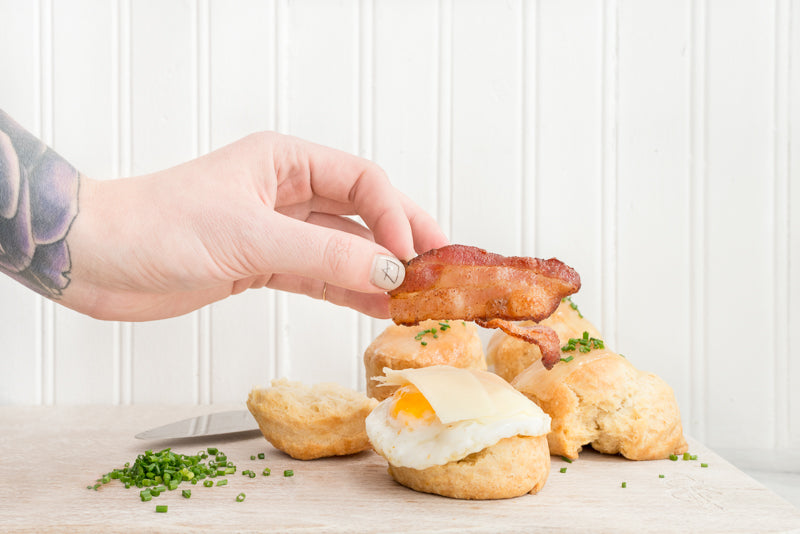
  • Remove your Frozen Bake-at-Home Mini Scones from the package, space evenly on a parchment-lined baking sheet, and bake at 350 F.  When you notice that the scones have started to turn golden brown (about 15-20 minutes in) rotate the tray and take the opportunity to place a small slice of cheese atop each scone.
  • While your scones are baking, fry up your bacon strips and set aside on paper towel to drain.  
  • When the scones are evenly golden brown and cooked throughout, remove them from the oven and immediately sprinkle with freshly chopped chives (so they stick).
  • Prepare eggs to your liking-  my favourite is softly scrambled with a splash of milk whipped in, but Bobby & Alena prefer sunny side up!  
  • Break each mini scone in half, and build your sandwich to your personal breakfast satisfaction- stack your eggs, bacon, cheese, a sprinkle of Old Bay and a dollop of mayo, jam, ketchup, or any other condiments of your choosing.  
  • Place the cheesy top half of the scone on your mountain of brunchy goodness. Your sammies should still be hot enough to melt the cheese inside, however if they have cooled off too much, feel free to return them to the oven for 3-5 minutes.
  • Serve immediately and enjoy into the afternoon! 


Continue reading

we're spreading the love!

we're spreading the love!

Welcome to the colourful, lovely life of Kitten and the Bear!  

It's hard to believe that we are coming up on Kitten and the Bear's 5th birthday. It seems like just yesterday my husband Bobby and I started this adventure as a small side project to create something magical together, and over the years we’ve watched it grow into so much more. It makes me smile to think back on how far we’ve come from our tiny KATB online shop- we now have a beautiful storefront in our favourite bit of Toronto, we’ve met the most amazingly talented people from all over, and there’s something so special about knowing our jam is nestled in all of your pantries. In short, it’s absolutely surreal and oh so astounding.  

Here in our little world of fruit, sugar, and butter, we've enjoyed more yogurt parfaits, tea cocktails, cheese boards, and confiture-topped ice cream sundaes than you can dream of.  Within the pages of this blog you can look forward to endless delicious jam-centric recipe ideas, plus a glimpse into what goes on behind the scenes in our kitchen, the team that we like to call our “jamily”, and more. We’ll also be featuring guest posts from all of the friends we've met along the way - from farmers to bakers, tea sommeliers to style icons, chefs to bartenders- the list goes on and on!

Our sugary world is pretty sweet here at KATB, and we thought it was about time to spread the love!

Sophie

Continue reading
Back to top